Prepare a Character for Single or Eight-Direction Animation
Create a character from an image or description, review the reference, and prepare consistent facing directions for your game.
A good reference saves work later. Before you generate several animations, make sure the character has the right silhouette, complete limbs, and recognizable equipment. This guide takes you from a source image to a confirmed character, then explains when to prepare eight directions.
If you want the whole process first, start with the Spritix workflow guide.
Choose your starting point
Open Studio and select New Character in the Character Library. On a small screen, open the Library from the bottom bar.
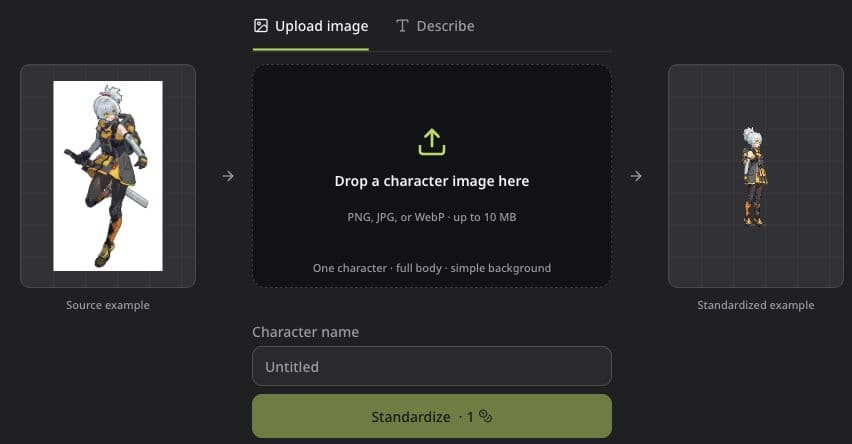
With Upload image, use one full-body character in a PNG, JPEG, or WebP up to 10 MB. Pixel art, illustrations, anime-style characters, and hand-drawn designs can be starting points. Keep the character large enough to read without cutting off the feet, hair, tail, or weapon.
Avoid group scenes, objects covering parts of the body, or a tiny character inside a large environment. A transparent background is useful but not required. If the background and clothing have similar colors, inspect the transparent edges carefully after generation.
With Describe, write about the character you want: body shape, colors, outfit, equipment, and visual style. Select Generate image, inspect the result, and edit the description before regenerating if necessary. Once you like the source image, select Standardize. For an upload, select Standardize after choosing the file and entering a character name.
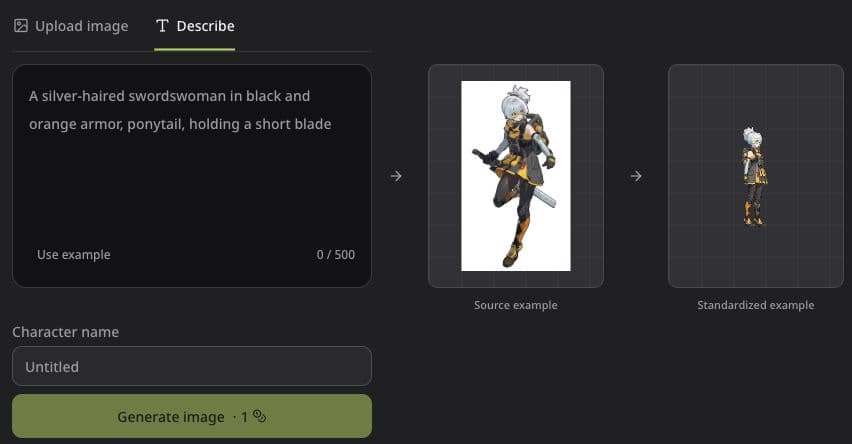
The two images beside the prompt are examples of a source and a standardized character, not a preview generated from your text.
Text image generation and standardization are separate steps, currently 1 credit each. Every source-image regeneration is another paid attempt, so settle the design before preparing it for animation.
Check the standardized character
Standardization prepares the reference image used for later animations. It may adjust the pose and small details. Compare it with the source before selecting Use this character:
- Does the face and outfit still identify the same character?
- Are hands, feet, and equipment visible and complete?
- Is the character's pose and facing direction readable?
- Is there enough space around the silhouette for motion?
If the candidate is wrong, Regenerate creates another candidate for 1 credit. If that attempt fails, the previous candidate remains available and the failed attempt is refunded. Accepting a candidate is free and does not start an action automatically.
Single direction or eight directions?
Use Single direction when one facing view is enough for the animation you are making. It is also the simplest way to evaluate a new character before creating more assets.
Use 8 directions for a character that needs to face around the screen. The compass labels describe facing views: N, NE, E, SE, S, SW, W, and NW. They do not add movement controls to your game; your game still decides which animation to play when the player moves.
In eight-direction mode, a Direction Set is the collection of reference images used across that character's actions. You prepare it before generating animations. If the 8 directions option is not available in your Studio, you can still follow the single-direction workflow.
Prepare and confirm a Direction Set
- Select 8 directions at the top of the workbench. Open Direction Set if you are viewing an action, then select Prepare directions. A full new set costs 5 credits before optional weapon removal.
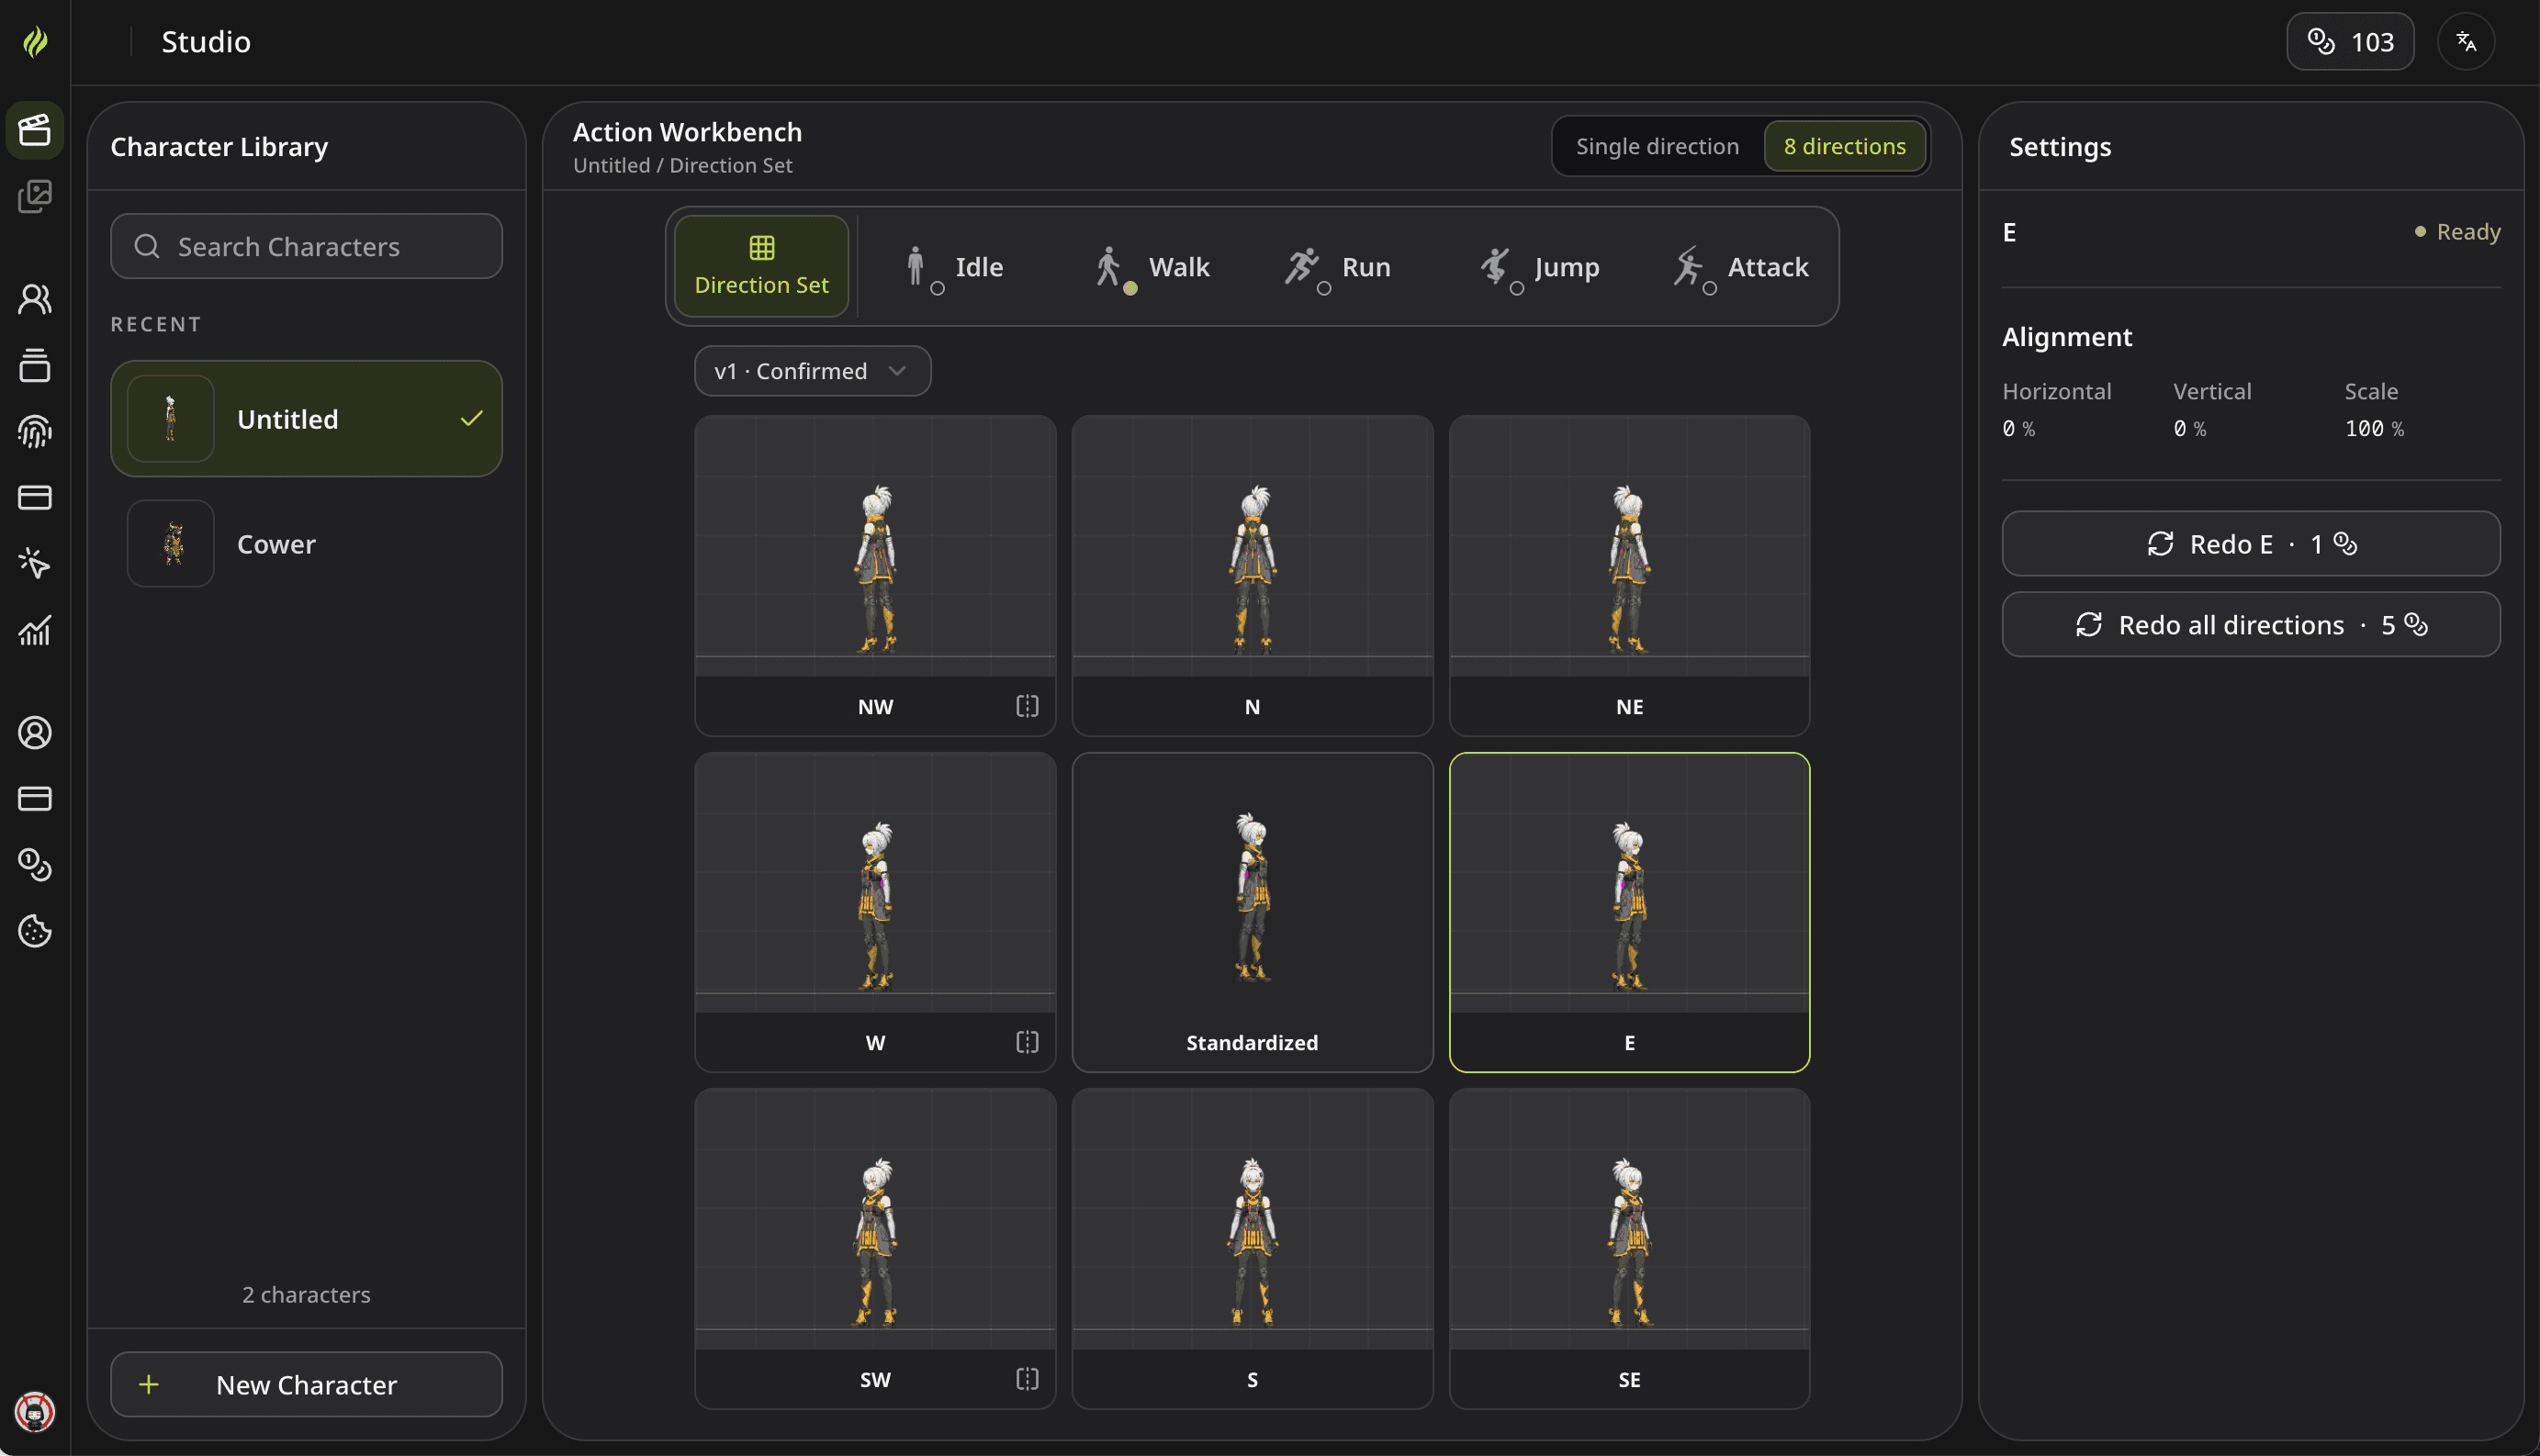
- Review the reference grid. Compare the head, torso, feet, clothing, and equipment across the views.
- If a generated view is wrong, use Redo for that view. Use Retry unfinished if preparation did not finish.
- Before confirming, select a reference view and check Alignment in the Settings panel. Adjust Horizontal, Vertical, or Scale if needed, then select Apply alignment. Confirmed sets show read-only alignment values.
- Select Confirm set when the references are ready.
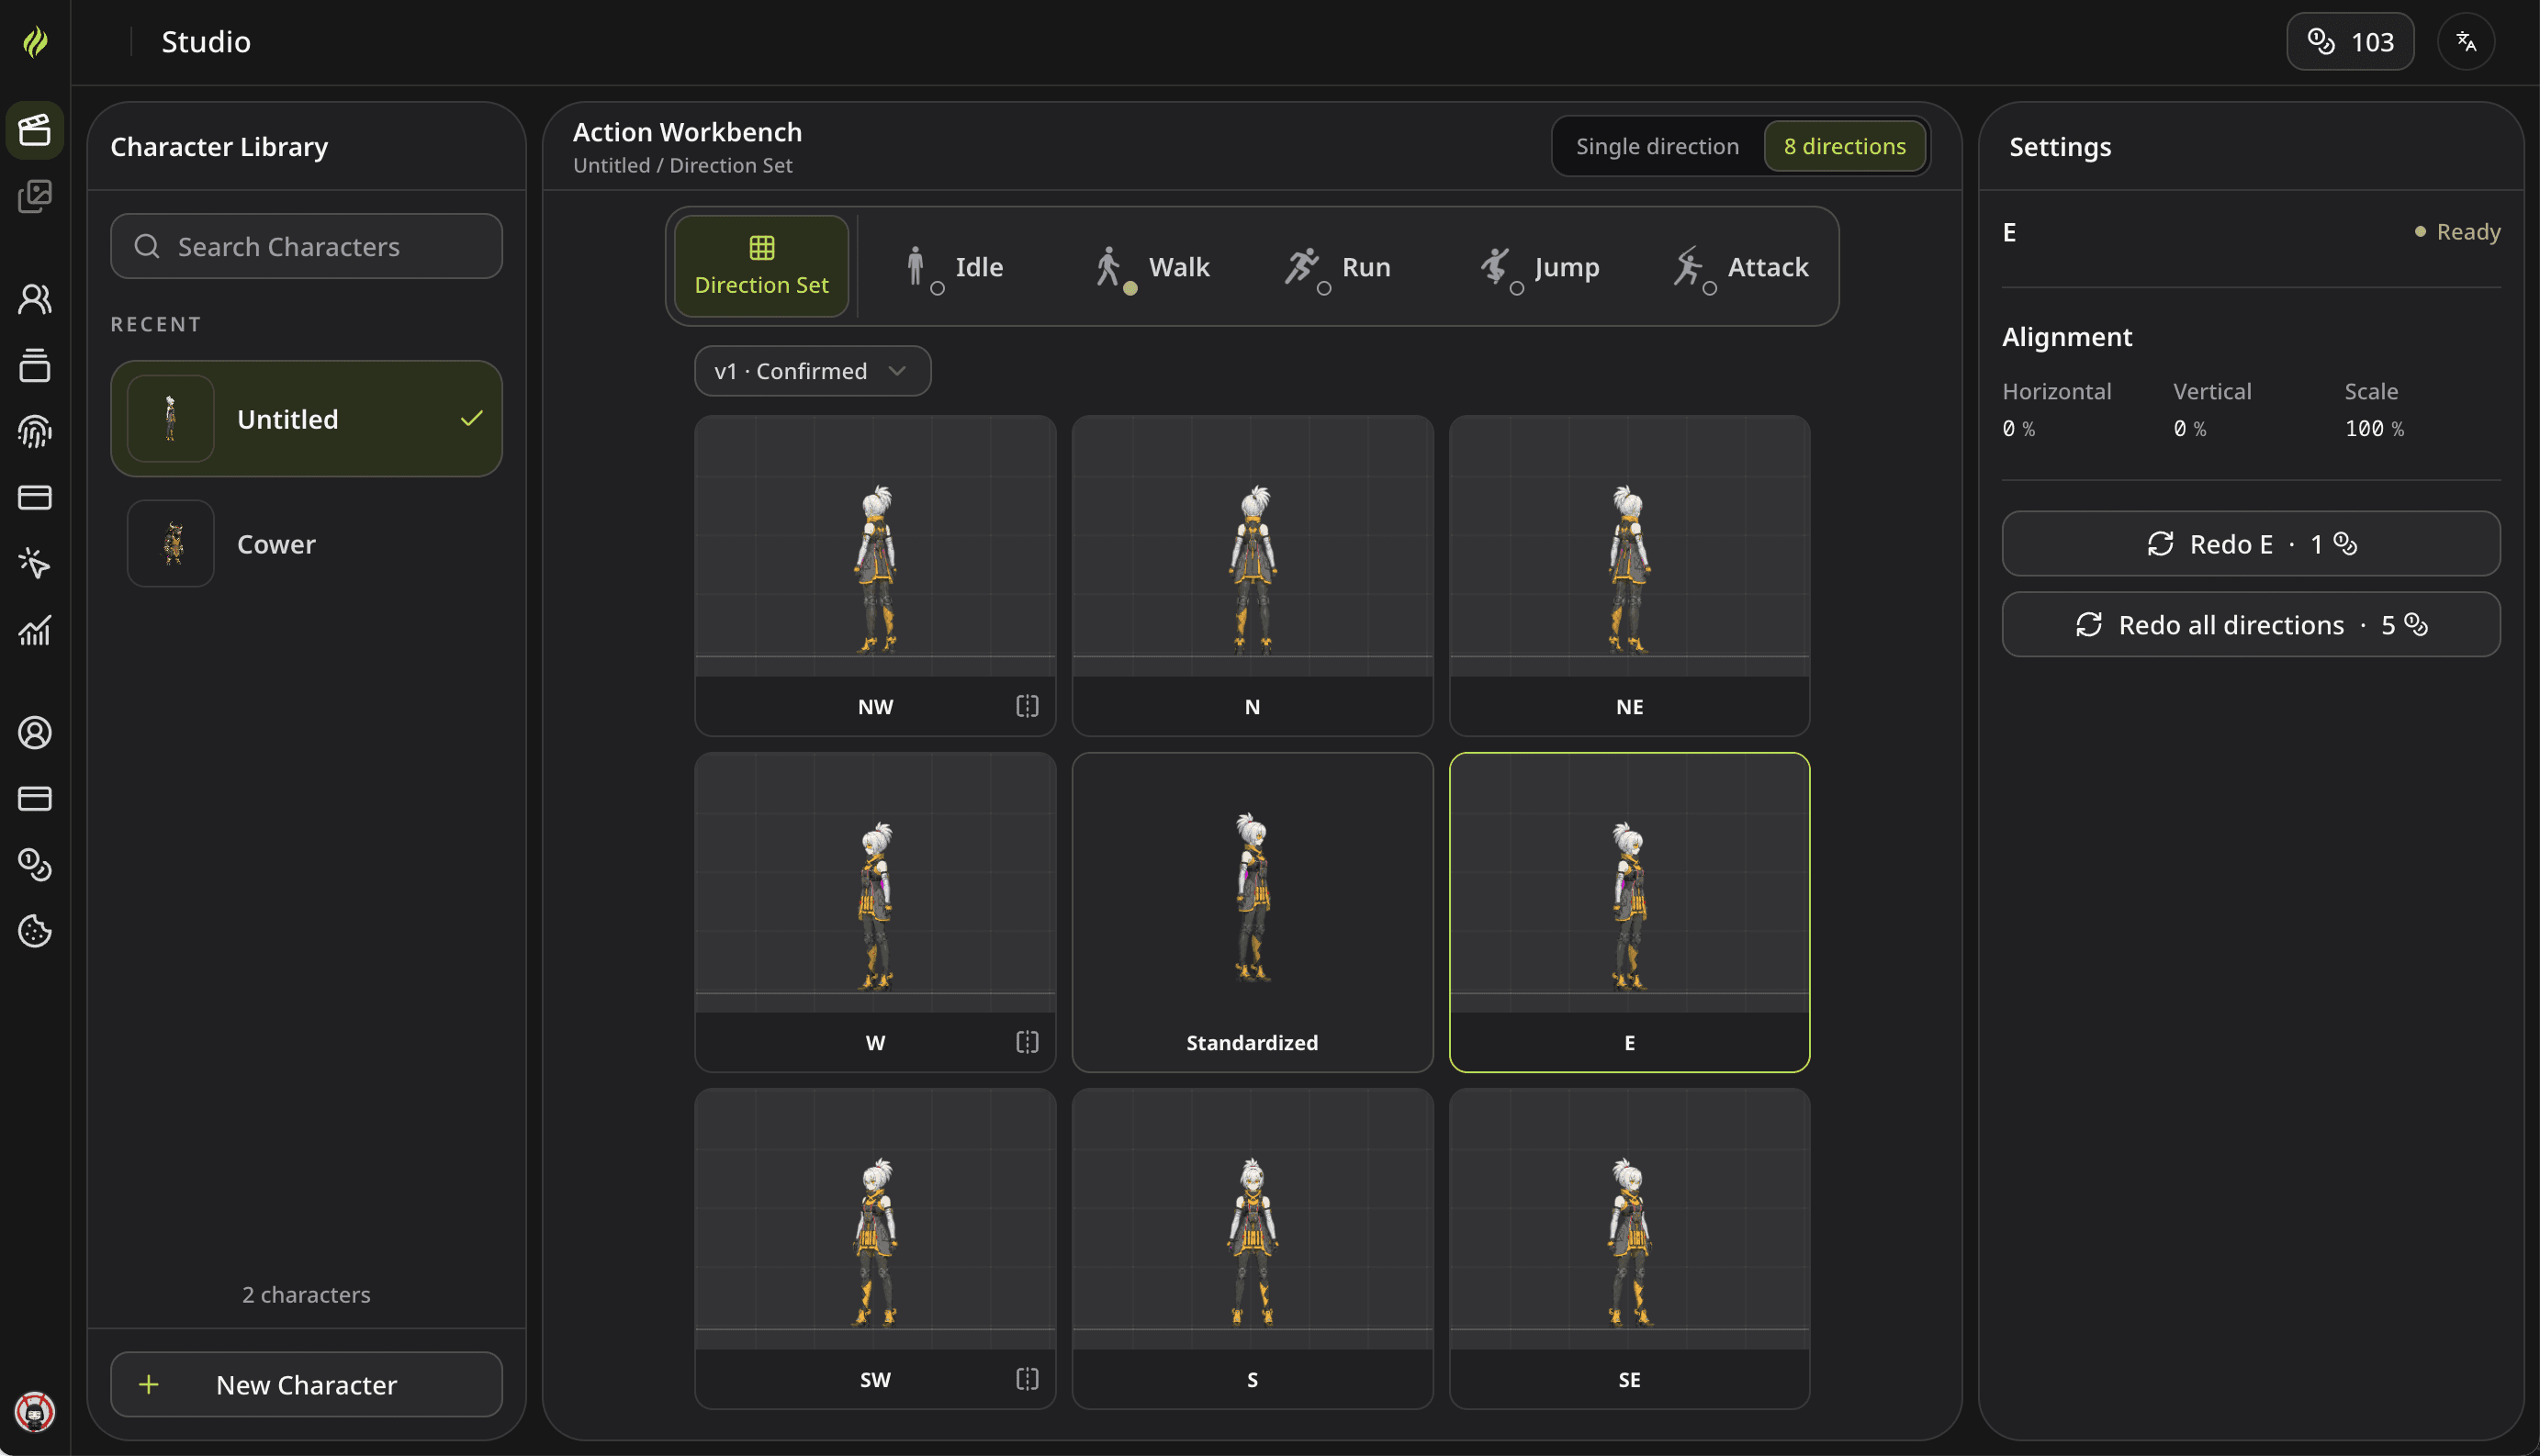
Select a view to inspect it. This example is already confirmed, so its alignment values are read-only.
Keep a consistent ground level and body scale across views. Otherwise, the character may appear to jump or shrink when your game changes facing direction.
A confirmed set is preserved. Redoing a reference creates a new set version rather than rewriting the references behind your existing animations. Confirm the new version before using it for new generation. Earlier action versions remain available.
Understand the mirrored directions
Spritix generates five source views: N, NE, E, SE, and S. The other three are horizontal mirrors:
| Source | Mirrored view |
|---|---|
| NE | NW |
| E | W |
| SE | SW |
The mirrored view shares its source's animation and editing settings. Redoing E also changes W in the new version, for example. You do not pay separately for that mirror.
This matters for asymmetric designs. A shield, eyepatch, or held weapon changes sides when mirrored. Inspect both views before using them in a game that requires consistent handedness. Mirroring does not create a separately drawn opposite-side view.
Decide about weapons before preparation
Before selecting Prepare directions, check Remove held weapon if you want an unarmed set and that option is available for your character. It adds 1 credit to that preparation and applies to all actions made with the new set. It does not remove the weapon from your original character or change existing single-direction animations.
Keep armed and unarmed work separate by preparing the appropriate set. Reusing a successfully prepared unarmed set does not charge the weapon-removal preparation again. Inspect hands and remaining equipment before confirming.
Generate only the views you need
Once the set is confirmed, choose an action, select the required directions, and review the cost before generating. Each requested source direction costs 5 credits at Low or 20 at Mid. For example, E and its mirrored W require one source animation, not two. A complete five-source action costs 25 credits at Low, excluding reference preparation.
You can add missing views or redo a weak source later. This creates a new action version, retaining the other available views from the same reference set. Switching to a different reference set starts a separate result rather than mixing unrelated references.
If one direction fails, the others can still finish. After the batch ends, you can edit and export successful views, then retry the missing ones. Credits charged for failed source directions are returned; canceling a running batch does not refund it.
Review the animation across views
A good reference set helps, but it does not guarantee that every generated clip will match perfectly. Play each view, then switch between views at the scale used in your game. Check ground contact, body size, equipment, and the timing of footsteps or attacks.
Use loop and version editing to refine the result. Then follow the export guide to understand the direction files and their playback timing. To try one sheet in an engine first, use the Godot import tutorial.
更多文章
How to Create and Export Character Animations in Spritix
Start with an image or a character description, create actions, refine the animation, and export files for your game.

Import a Spritix Sprite Sheet into Godot
Slice a sprite sheet, create a walk animation with AnimatedSprite2D, and match playback speed in Godot 4.
Luna Animation Case Study: One Character, Five Actions
A review of one Luna source image and five actual Spritix outputs, including what stayed consistent, what changed, and which generation details were not recorded.